
How to Order Replacement Window Screens Online and Install Them Yourself
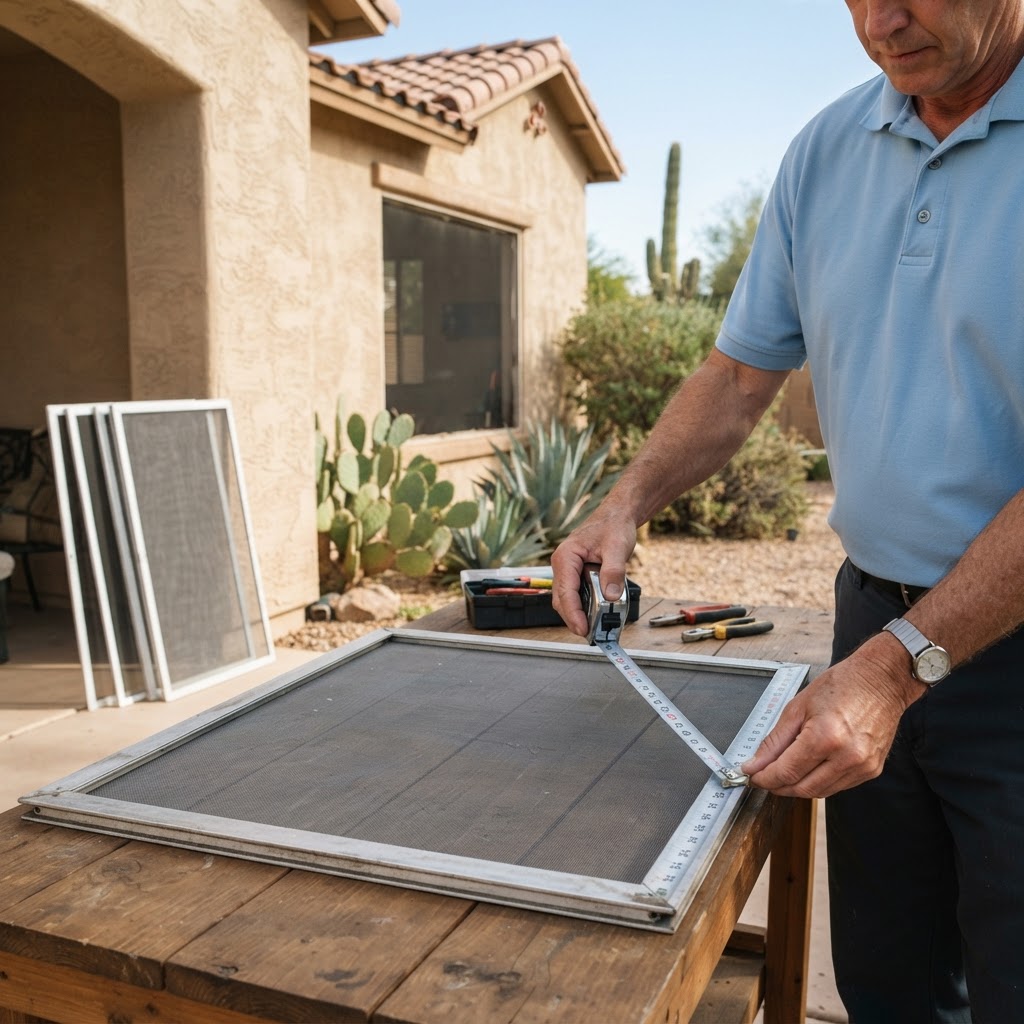
You can order custom-built replacement window screens online and install them yourself in about five minutes per window — the whole job is measuring accurately and choosing the right mesh. For homeowners with standard sliding or single-hung windows and screens they can reach safely, this is the cheapest way to re-screen a house in the Phoenix Valley.
Here's the process, done properly, so your screens fit the first time.
Step 1: Decide Whether DIY Is Actually Right for You
Be honest about this before you measure anything.
DIY works well when:
- Your windows are standard rectangles
- Screens come out from the inside, or you can reach them safely from the ground
- Existing frames are straight and reusable or you're replacing whole screens
- You have five or more screens (the savings scale)
Skip DIY when:
- Screens are on a second story and you'd be working from a ladder
- Openings are arched, trapezoidal, or otherwise irregular
- You're doing solar screens and want per-window exposure guidance
- Existing frames are visibly bowed — a new screen in a warped frame won't seal
- Screen doors are involved (different measuring rules, different hardware)
Nothing about a window screen is worth a fall off a ladder. If the screens you need are upstairs, get the on-site quote.
Step 2: Measure the Old Screen, Not the Window
This is the single most common mistake. Measure the existing screen frame, not the window opening.
The window opening and the screen are different dimensions — the screen sits in a channel and is deliberately smaller. If you measure the opening and order that size, the screen won't fit.
For each screen:
- Remove the screen. Most pop out by squeezing the plunger tabs on one side, or by pushing up and swinging the bottom out.
- Lay it flat on a hard surface.
- Measure the frame width — outside edge to outside edge, at the widest point. Use a steel tape, not a cloth one.
- Measure the frame height the same way.
- Measure to the nearest 1/16 inch. Round guesses produce loose or non-fitting screens.
- Write it on masking tape stuck to the screen — width first, then height, plus which room and window it came from.
That last step matters more than you'd think. Seven screens laid in a garage all look identical, and mixing them up at install is genuinely frustrating.
Step 3: Note the Frame Profile and Hardware
Before you order, check two more things on the old screen:
Frame thickness. Common residential profiles are 5/16", 3/8", 7/16", and 3/4". Measure the frame's depth where it seats in the channel. The wrong profile won't sit in your window track.
Hardware. Look at what holds the screen in — plunger pins, spring-loaded tabs, clips, or nothing at all. Note it so your replacement arrives with matching hardware.
A photo of the old screen's corner and hardware, taken before you order, resolves almost every question that comes up later.
Step 4: Choose Your Mesh
This is where most of the actual decision-making lives.
- Standard fiberglass (18x16) — Best for: General-purpose bug screening, lowest cost · Tradeoff: Least durable in Arizona sun
- Nano 50 fine bug mesh — Best for: Keeping out gnats, no-see-ums, and small insects · Tradeoff: Slightly reduced airflow
- PetTex pet-resistant — Best for: Households with dogs or cats · Tradeoff: Heavier appearance, higher cost
- Solar screen 80% — Best for: Meaningful heat reduction, keeps more visibility · Tradeoff: Darker than bug screen
- Solar screen 90% — Best for: Maximum heat and glare reduction on west-facing glass · Tradeoff: Darkest, most view reduction
A practical Valley approach: solar screen on west and south windows, standard or fine bug mesh on north and east, PetTex anywhere the dog has access.
You don't have to use the same mesh on every window, and you shouldn't.
Step 5: Choose Frame Color
Match your existing trim. Bronze and white cover most Valley homes. If you're in an HOA community, check your architectural guidelines before ordering — frame color is the most commonly regulated element, and a wrong color on a street-facing window is how violation letters start.
Step 6: Order
With dimensions, frame profile, mesh, and color in hand, you can configure and price everything yourself at Screens2Go. You'll see instant pricing per screen before you commit, and choose pickup at one of our two shops or delivery on our Valley route.
If you'd rather not measure at all, our pickup and delivery service is the alternative: we collect your old screens, measure them at the shop, quote them, and deliver the finished screens back to your door.
Step 7: Install
The easy part.
- Match each new screen to its labeled window. This is why you labeled them.
- Seat the top of the frame into the upper channel first.
- Compress the plunger tabs or springs and swing the bottom into place.
- Release and confirm the frame sits flat with no gap along any edge.
- Push gently from inside. The screen should stay seated with no rattle.
If there's a visible gap anywhere along the perimeter, something is off — usually a bowed window channel rather than a bad screen. Don't force it.
Common DIY Mistakes
- Measuring the opening instead of the screen frame. Covered above, but it's worth repeating because it's the number one cause of unusable orders.
- Rounding to the nearest half inch. Screens are built to your number. An imprecise number produces an imprecise screen.
- Using a cloth tape. It stretches. Steel only.
- Not labeling. Ten minutes of frustration per screen at install time.
- Reusing a warped frame. If the old frame is bowed, re-screening it just puts new mesh on a screen that won't seal. Replace the whole thing.
- Ignoring the spline groove. If you're re-screening an existing frame yourself rather than ordering a complete new screen, budget for new spline. The old one is brittle and won't hold.
When to Just Call Us
DIY ordering saves real money on straightforward screens. It's the wrong choice for second-story windows, arched or irregular openings, screen doors, whole-home solar screen projects where exposure matters, and any frame that's already damaged.
Window Screen Guys builds every screen locally in Phoenix, measures on-site when you want it done for you, and serves Phoenix, Scottsdale, Peoria, Surprise, Glendale, Cave Creek, Anthem, Mesa, Chandler, and the wider Valley. Licensed Arizona contractor, ROC #362719.
Call (480) 771-6091 or request a free quote.
Ready to measure and order yourself? Start at Screens2Go.
Frequently Asked Questions
How do I measure a window screen for ordering online?
Remove the existing screen, lay it flat, and measure the frame from outside edge to outside edge — width first, then height — to the nearest 1/16 inch with a steel tape. Measure the screen frame, not the window opening; the two are different dimensions and ordering the opening size will produce a screen that doesn't fit. Label each screen with its measurements and its room.
Can I order custom window screens online in Phoenix?
Yes. Screens2Go lets you configure size, mesh type, and frame color and see instant pricing before ordering, with pickup at either Phoenix Valley shop or delivery on the local route. Screens are built to your exact measurements at the Phoenix facility.
Is it cheaper to replace window screens myself?
Usually, yes — you're paying for the screen without the on-site measure and install labor, and the savings scale with the number of screens. The tradeoff is that measurement accuracy is entirely on you, and a mis-measured screen is a screen you can't use. For five or more standard ground-floor windows, DIY typically makes sense.
How long does it take to install a replacement window screen?
About five minutes per window for a standard screen. Seat the top of the frame into the upper channel, compress the plunger tabs or springs, swing the bottom in, and release. The screen should sit flat with no gap along any edge.
What if my window screen frame is bent?
Replace the whole screen rather than re-screening the existing frame. A warped frame won't seat flat in the window channel, so new mesh on a bowed frame still leaves gaps for insects and dust. Arizona's daily temperature swings bow thin builder-grade aluminum over a few seasons, so this is common on Valley homes.
Should I measure and order myself or use pickup and delivery?
Measure yourself if your windows are standard rectangles you can reach safely and you're comfortable working to 1/16 inch. Choose pickup and delivery if your screens are upstairs, the openings are irregular, or you'd simply rather not be responsible for the numbers — we collect the old screens, measure them at the shop, and deliver the finished ones.
Need help with your windows?
Shop Screens2Go